Prospect identification |
  
|
Prospect identification |
|
Prospect Identification is general data about the prospect - what it's called, where it is and so on.
The data are entered into a single dialog with a number of tabs. Not everything needs to be filled in (see below) but the more you do fill in (especially comments) the more useful your analysis will be to colleagues and those who come after.
The tabs are:
Note: 1. Entries with a light blue background must be filled in.
2. Values may appear in three different colours: red is the program default, blue is a value calculated from elsewhere in the prospect dataset and green is a value that has been entered manually.
Reserves class is the reserves classification to which the prospect reserves are assigned.
[Note: The classes can be defined to suit your particular scheme. Email us for instructions.]
Reference is a free text entry for your convenience. It is not used by the program. It is shown at the bottom of printed pages.
Pre/post-drill and Evaluation refer to the current evaluation stage. See our section on 'Prospect Evaluation' for more information.
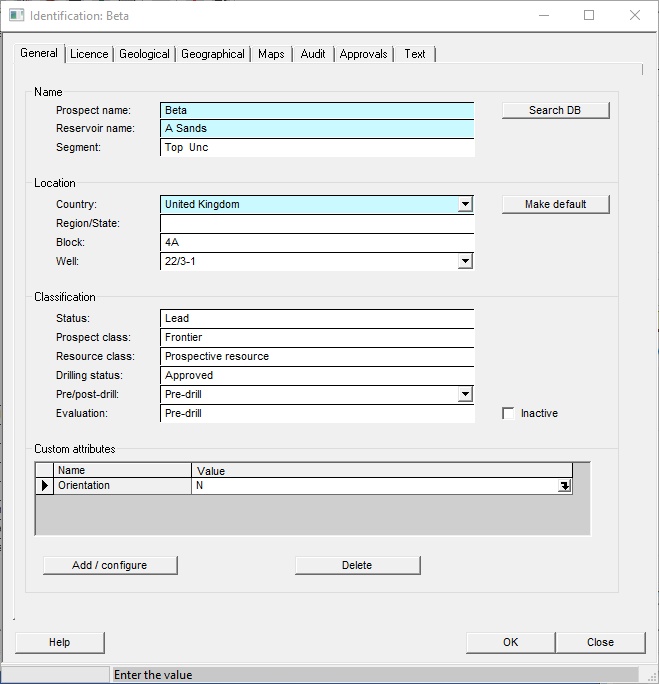
Name |
|
Prospect name |
Enter the name of the prospect |
Reservoir name |
Enter the reservoir name |
Segment |
Enter the prospect segment name, if you are analysing just a bit of the prospect (e.g. a particular fault block). |
|
|
Location |
|
Country |
Enter the country in which this prospect lies. [Note: Recent and continuing political excitements mean that our list (which is the United Nations ISO standard) is generally out of date. It can be easily changed and if you need to do so please contact us for information on how it can be done.] |
Set as default |
Click to enter default country (as defined in Set up and defaults) |
Region/State |
Enter the region, state or other sub-division of the country. |
Block |
Enter the block in which this prospect lies |
Well |
Associated well name - presumably the exploration or discovery well. If you have a valid project (i.e. not the default project) new wells are added to the project and can be chosen from the dropdown list. |
|
|
Classification |
all these are drop-down options |
Status |
The prospect status can be Concept, Lead, Prospect or Discovery |
Prospect class |
Enter the classification for this prospect - see list |
Reserves class |
Enter the reserves classification for the prospect/discovery. The list is based on the PRMS classification. |
Drilling status |
Enter the drilling status |
Pre/post-drill |
Is this pre- or post-drill? |
Evaluation |
Enter the name of the current evaluation. See evaluations |
|
|
Custom attributes |
These are user defined prospect/field attributes which are stored with each asset but also defined for the project |
Name |
The attribute name |
Value |
The attribute value |
Add/configure |
Add and edit the current set of attributes. Click here for more instructions |
Delete |
Delete the current attribute. If you want to do this (and you are reminded of it) the attribute will be deleted in the project and all the assets it contains |
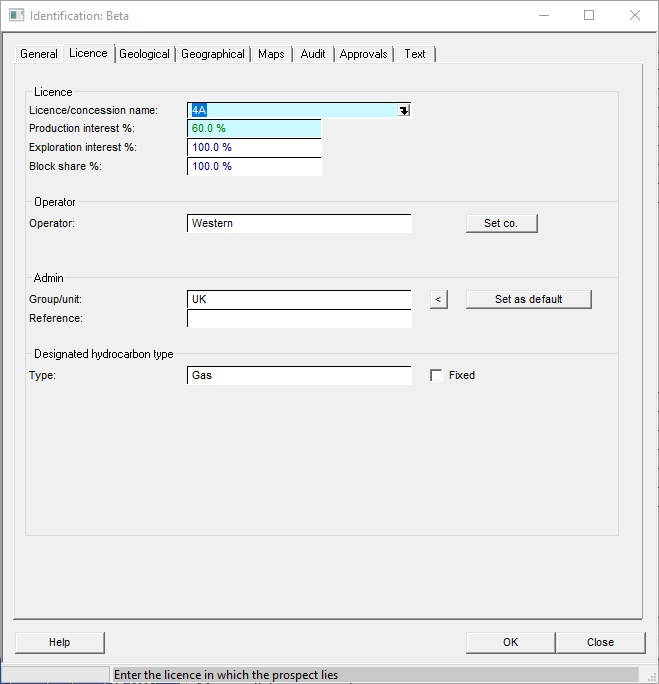
Licence |
|
Licence/concession name |
Enter the licence in which the field/prospect lies |
Production interest % |
Enter your company's percentage interest in any revenue from prospect. It is used by the program to convert gross (whole trap) volumes to net (company share) volumes. |
Exploration interest % |
Enter your company's percentage working interest - the proportion of the costs that your company will pay. Note that this is often (if not usually) higher than the production interest. |
Block share % |
Enter the share of the accumulation in the given block |
|
|
Operator |
|
Operator |
Enter the operator of the licence |
Set co. |
Click to enter default company name - this will be the name of the company entered in "Setup and defaults", and is presumably your own company's name. |
|
|
Admin |
|
Group/unit |
Enter the business unit/user group/client. The arrow to the right copies the entry from your user set-up entry. |
Set as default |
You can set the above entry as your user default, by clicking this button |
Reference |
Enter a reference number/string |
|
|
Hydrocarbon type |
Choose from the list |
Fixed |
If the Fixed box is unchecked, REP will decide the designated hydrocarbon type at the end of a calculation. It does this by comparing the volumes of oil, gas (as oil equivalent) and oil + oil-equivalent gas condensate, whichever is the higher. If Fixed is checked you decide; and your wishes will be respected. |

Play |
|
Basin |
Enter the geological basin in which the prospect lies |
Play |
Enter the play of which the prospect forms a part |
|
|
Details |
.. see also the retrieve button below |
Depth datum |
Select from which level the prospect depth should be measured |
m <> ft |
Click to change units of depth |
Datum depth |
Enter the height of the datum above mean sea level/ground level |
Depth to crest |
Enter the approximate depth to the primary target |
Depth to base column |
Enter the approximate depth to the base of the reservoir column |
Column height |
Enter the approximate column height |
Reservoir thickness |
Enter the approximate gross reservoir thickness |
Trap area |
Enter the approximate trap area |
km2 <> acre |
Click to change units of area |
Retrieve |
Most of the parameters above will be entered later as prospect parameters that are used in the calculation. This retrieve button gets them from entered data. So rather than enter all the data above before you'vce done the main analysis, leave them blank, do the analysis, come back here and click retrieve. Voila! |
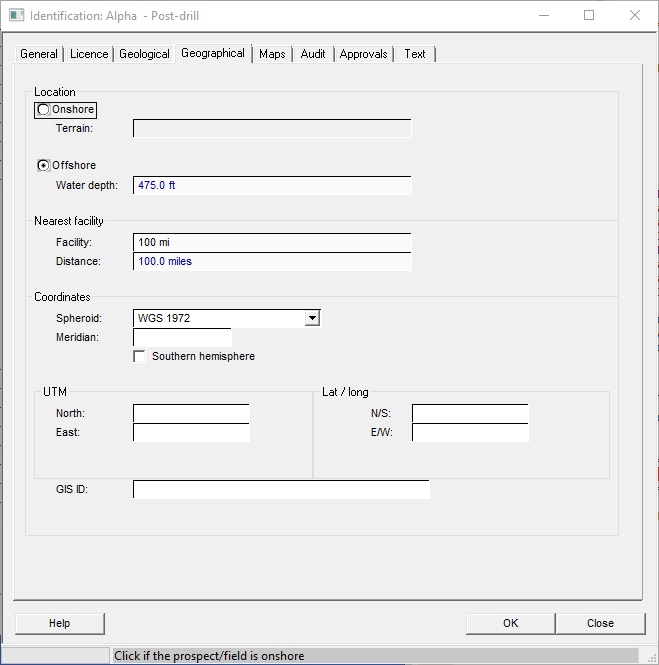
Onshore/Offshore |
Circumstance of prospect |
Terrain |
Onshore prospects - choose the environment |
Water depth |
Offshore prospects - the water depth |
Nearest facility |
The nearest processing station (where the hydrocarbons are delivered) ... |
Distance |
.. and how far away it is. |
Location |
This can refer to either the exploration well, or be a more general indication. Entry can be either by UTM's or lat/longs. If you specify both the UTM central meridian and the Lat/long spheroid a conversion can be made between the two. |
Meridian |
The zero point of the UTM easting |
Southern hemisphere |
Check if the location is south of the equator |
Spheroid |
The spheroid used for the lat/long coordinates. WGS 1984 is the standard for GPS, but many exist, and most are in the drop-down list. |
North/East |
The UTM coordinates |
N/S |
The latitude in format dd mm ss.ssN (or S) |
E/W |
The longitude in format dd mm ss.ssE (or W) |
GIS ID |
This is an identifier to link the prospect file to a GIS entity. It should be supplied by your GIS administrator. |
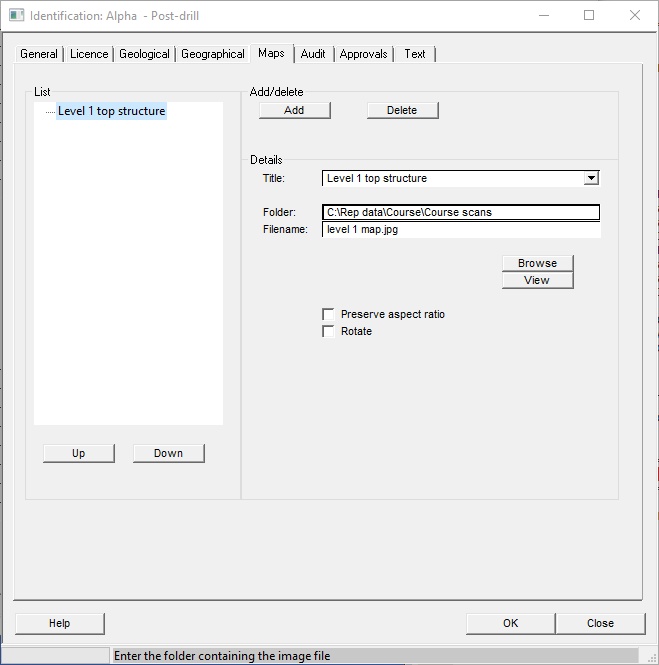
On the printed output sheets, space is left for various maps. There are two ways to fill in these boxes: skilful use of a photocopier, or specifying jpeg, bitmap files or other image files, if you have them somewhere on your system.
You can have up to twenty maps or images. The first two in the list are shown side by side near the top of the Summary Page of the printout. If you do a Full Page printout, the first map is also shown on the front page, and all the other maps are shown on succeeding pages, one to a page. The images can be rearranged using the [up] and [down] buttons.
In the dialog, click the [Add] button to add an image file. Once the desired file is found, click [OK] and it is added to the list on the left. To edit an existing entry, click on it in the list.
Each map or image may be given a title. There is a drop-down list of common titles ("Seismic section", "Location map" etc.) but you can enter anything you like ("Compromising picture of CEO", for example).
For an image, check the box 'Preserve aspect ratio" to ensure that the image will not be unequally squeezed to fit the space on the printed sheets.
You can also ask to rotate the image on the page.

Add |
Add a new map |
Delete |
Delete the current map |
Title |
Select a title for the map. Use the drop-down list, or just type it in. |
Folder |
Enter source folder or browse |
File |
Enter source file or browse |
Browse |
Browse for a new map file |
View |
View map - it will open in whatever program with which its file trailer is associated (a Windows issue) |
Preserve aspect ratio |
Preserve aspect ratio of the map - otherwise it will stretch/squeeze to fit the print area |
Rotate |
Rotate the map when printing it (clockwise). |
Up |
Move the current map up in the list |
Down |
Move the current map down in the list |
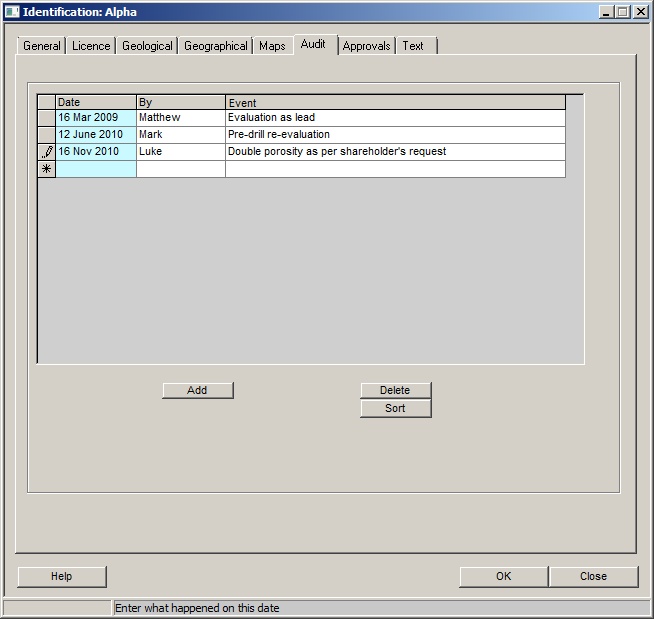
This tab allows you to enter a short text as an audit trail.
Click [Add] to add a new line to the audit. The program will fill in the date and your name. Under Event, type in what you did.
Entries can be deleted and sorted (by date).
Table |
|
Date |
Enter the date |
By |
Enter who it was who did it |
Event |
Enter what happened on this date |
Add |
Click to add new entry |
Delete |
Click to delete selected entry |
Sort |
Sort entries by date |
|
|
In this tab you can enter details of an appraisal / approval process.
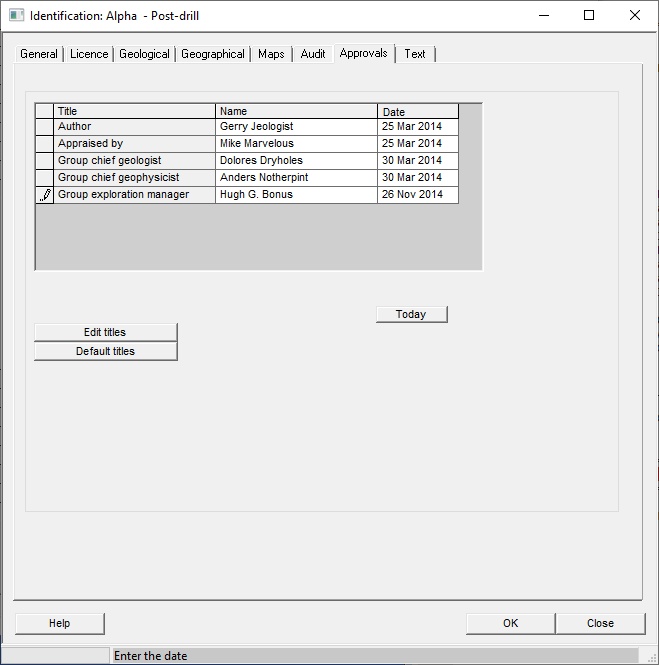
The titles are set by default in the site set-up: see Installation options: approvals list.
Table |
|
Title |
The title of the person at this approval level |
Name |
The actual name of the approver |
Event |
The approval date |
|
|
Today |
Click set today's date (click the line where you want to insert the date - there must already be a name) |
Edit titles |
The titles are set in the installation set-up, and are not editable - unless you click this button. |
Any textural description of the prospect.
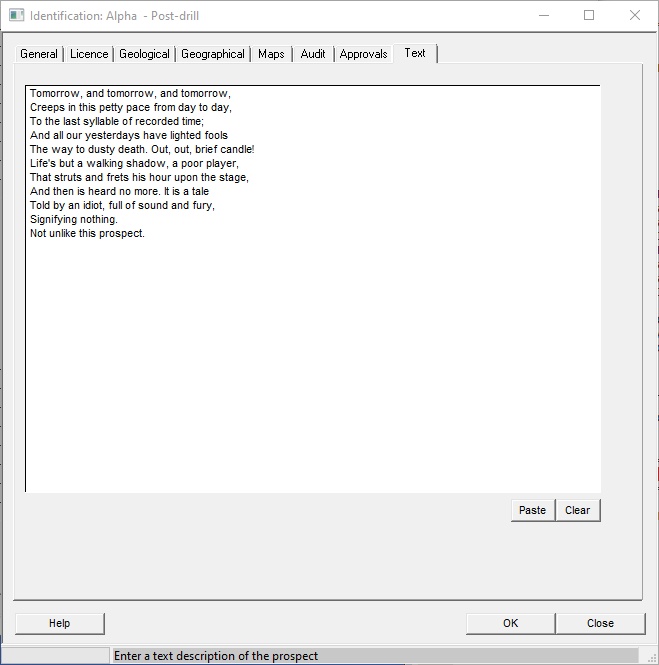
Enter a text description of the prospect |
[Note: You can cut and paste the text into or from any Windows program that supports cut and paste. To put data into the clipboard, highlight the text and press Ctrl-c (the "Ctrl" and "c" keys together) on the keyboard. To paste clipboard data into REP (or another Windows program) press Ctrl-v.] |
|---|---|
Paste |
An easy alternative to Ctrl-v |